Zalo DS Blog

Tuesday, January 03, 2017

ZGB, a little engine for the Game Boy

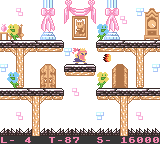
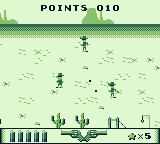
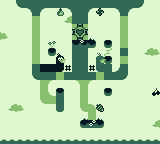
2016 has been an interesting year for the Game Boy scene. I remember back in 2015 talking with people developing for the Game Boy saying lots of docs with important info had been lost over the years and that the scene was dying... Well, I am not sure what happened, but in this past year I've seen some really cool games like: carazu, Rocket Man, Where's my cake?, Soup Raiders: Jailbreak, Biotic Limit, Snake Bird, Araku Hime: The Red Princess, Guns & Riders... it seems that the game boy scene has revived!!


Read more »

Monday, January 02, 2017

Super Princess' 2092 Exodus

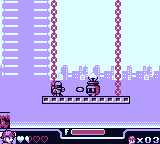
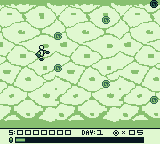
Initially developed for the gbjam5 this is the second game I develop for the Game Boy and also together with sergeeo doing the art and music.

The gbjam5 ran from October 1st 2016 at 7:00 AM to October 10th 2016 at 7:00 AM. 399 games were entered, wow! Contrary to the bitbitJAM the games were not required to work on real hardware, actually the games just needed to be thematized as Game Boy games. I already had the engine I created for Pretty Princess' Castle Escape and I wanted to give it another try. Most of the time I spent on the bitbitJam was actually on the engine and not the game itself, so I knew we could do something better.


Read more »

Sunday, December 04, 2016

Game Boy Development - Tips and Tricks (III)

This is the 3rd post on the series Game Boy Development - Tips and Tricks

7. SDCC Issues


No matter how you look at it, the SDCC that comes with the GBDK has some serious issues. Here I am going to talk a little bit about some of them that I have been able to isolate an reproduce 100% and the workarounds I was forced to use.

Read more »

Sunday, September 11, 2016

Getting the Wii core back

One of the things that has been bothering me over the past 4 years is not being able to compile for the Wii. I had support for it a few years back, but then I introduced several improvements and never found the time to work on them for the Wii.

Recently with the 3ds port a bit more stable I decided to get it back. There are other platforms I want to support in the future but before that it is important to get all my cores up to date. Taking advantage of all the things I did for the 3ds and all the improvements that had been added to Dolphin during all these years I had finally updated it!

Read more »

Sunday, July 31, 2016

Game Boy Development - Tips and Tricks (II)

Read more »

Thursday, July 28, 2016

Game Boy Development - Tips and Tricks (I)


As promised here is the first post with some advices based on my experience programming for the Game Boy during the Bit Bit Jam 3.

1. Choosing your SDK

The Gameboy has some different SDks you can choose to work with. The two main ones are the GBDK and the RGBDS. Choosing between any of them depends on what you want to accomplish and what skills you have. Check the next table with pros and cons of each one


GBDK RGBDS
C and asm asm (better than asm in GBDK*)
Slower if you use C Asm is always faster but requires experience
Faster to write programs in C Assembly is very low level, requires more time
Reliable for a jam If you are not an skilled programmer you might not finish your jam entry
Horrible SDK for learning C because of the 8bits limitations, no debugger.... Perfect for learning asm. You can even use a debugger with the BGB emulator 


With all these in mind, I chose GBDK because I have a lot of experience with C and C++ and I was feelling more confident to finish the game with it.

*so I've heard, because I didn't have the chance to try it

2. Getting your environment ready

I will suggest spending some time doing this, it can save you from lot of problems that will happen that last hour before sending the game. Code completion, launching the emu after compiling and the ability to add or delete files from your project easily are the things you should focus to get before starting your project.

A couple of weeks before the jam I started playing with GBDK and getting my development environment ready. Same as I did for the 3ds, Ds and the Wii I started configuring visual studio and some makefiles (see this post for more info). Most of the tutorials I followed along the internet were using some dos .bat files but I was looking for something more general. I created a makefile that:

- Compiles any source found under the folder src, so you don't have to specify the list of files to compile

- Parse the extension of the file to select the bank (anything.c will be on bank0, anything.b1.c will be on bank1, anything.b2.c on bank 2 and so on...)

- Automatically changes the unsigned char of the resources exported by GameBoy Map Builder and GameBoy Tile designed to const unsigned char

And some other features that you can check here. The important thing is having a confortable environment so you only have to worry about coding the videogame

If you are under Windows you will need a way to run makefiles. Since I have been using devkitpro for a long time I already had msys installed. One funny thing that I noticed is that the version of make that comes with devkitpro doesn't display any compilation errors so I guess the stderr is not properly configured. If you have the same problem you just need to download the last version of make for windows here

3. Banks

I would recommend reading the full documentation of the GBDK prior to any development. And specially trying to understand banks, what they are and how they work. AntonioND explains it pretty well on this post. The idea is very simple. If you take a look at the size of variables of the GBDK you'll see that the size of a pointer is 2 bytes. The maximum address you can point to with 2 bytes is 65535 (2^16). In these addresses the gameboy needs to get access to everything, not only the rom. Basically it needs 32kb for internal registers: sound, video, power, etc (you can find the complete list here if you are curious) and then there are other 32 kb for rom access(the cartdridge data). These 32kb are splitted into two: a fixed part that is always accesible (called bank0) and a swapable part (by default set to bank1). You can change the starting address of bank1 and make it point to addresses beyond 65535. Each group of 16386 (16kb) is known as a bank

So the idea is splitting your code along any of these banks and before excuting any part of it swapping the start address so the code can be reached. Take some time to understand this because it is extremely important. And also pay attention to the next things:

- You can only swap banks from code that is stored in bank0. Actually you can swap banks from any bank if you dare but your program will crash and it has an easy explanation. In any computer no matter how big or small it is there is a register (usually known as EIP) that contains the address of the next instruction to be executed. If no jump occurs then this register will automatically advance to the next register and execute the next instruction and basically that's how programs run. So, what will happen if you are in bank2 for example and swap to banks3? The EIP will execute the command to change the bank (in bank2) then it will advance to the next register and will try to execute the next command. The problem is that this comand that was supposed to belong to bank2 now belongs to bank3 and it can be literally anything. An easy solution to this is calling a function on bank0 (always accesible) that swaps banks, do the job on that new bank and then before returning swap banks back to bank2

- Lcc errors. You will eventually find a message like this from the compiler "warning : possibly wrote twice at addr 407a (21>21)". This will happen everytime you write code larger than 16kb and part of it ends in addresses that belong to the next bank. When this happens you should start moving your code to another bank

- Try to fill all banks with some info. If you have decided your game is gonna take 4 banks then the size of the game will be 64kb (16kb per bank) event if you don't fill them. Because of this it is a good idea to put some info in each bank from the beginning, otherwise you won't see the message I was telling you before when a bank gets full and your program will randomly crash at some point

- A stack can be very helpful to deal with bank swapping. Implementing a stack is very simple, you can check my implementation here. Once you have a stack implemented you can use it to move between banks like I do here. Everytime I want to change to a new bank I call PUSH_BANK and when I finish I just call POP_BANK so it automatically leaves me on the previous bank. Using this technique I was able to call gbt_update that automatically changes the bank to bank1 on my vblank interruption and then return to the bank I was previously working on calling REFRESH_BANK, fixing the issue AntonioND is stating on this post

4. Basic Maths

The Gameboy isn't very powerful and it can't even deal with multiplications or divisions, so you should avoid them at all cost (you can use them, but the performance will suffer). Most of these multiplications and divisions can be replaced by simpler operations, like:

- instead of multiplying by any power of 2 use the shift left operator (<<). Specially for multiplying by 2 use x << 1

- instead of dividing by any power of 2 use the shirft right operator (>>). Specially for dividing by 2 use x >> 1

- instead of the module operator (%) with any power of 2 you can do a mask. For example for getting the module 8 of a number do x & 0x7 (7 is 111 in binary so using & here turns everything except the last 3 digits into 0 which is what we want)

- the gbdk manual encourages you to use unsigned values. Take into account that these values are always bigger than 0. So doing something like 3 - 4 will result in an overflow giving you 255 (or 65535 if you are using 16bits) and checking if this is < 0 will unexpectecly return false. The best way I found to deal with this is masking against 0x8000 (1000 0000 0000 0000 in binary) and checking that the result is 0 (that 1 in the highest bit will only happen after an overflow)
Tuesday, July 26, 2016

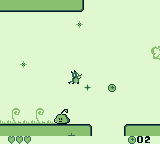
BitBitJam 3 - Pretty Princess' Castle Escape

The bit bit jam is a retro jam based on old systems up to 16 bits. The jam lasts one week and you can use any technology you have developed before that week. The game must work in real hardware.

Before the jam starts a theme is randomly selected and this year it was "Red Hot Princess Carnage". A total of 20 games were presented. You can take a look at all of them here, and also you can check the winners on each different category: best theme, best platform usage and funniest game

This year I ended up joininig forces with sergeeo. He was in charge of the music and graphics and I was working on all the coding stuff. Together we created Pretty Princess' Castle Escape for the old nintendo Game Boy. Althought we finished the game on time we continued working on it after the jam and finally we have released a new version we consider final. Check it out here!


We'd like to thank all  the guys playing it and specially the ones who have uploaded some videos:


Also special thanks to David Colmenero for organizing the jam and for convince me to participate

During this week I'll be posting a few entries with my experience developing using the GBDK providing some info that I hope will be usefull for someone. Stay tuned!

Tuesday, January 05, 2016

Rokoban for Nintendo 3DS


Rokoban is not a new game. I already released it on Nds and later on the Wii (and it won the 4th place on the Wii Homebrew Competition organized by tehskeen in 2008). After that I was going to release a new version for IOS and Android about 4 years ago. Although very close to finishing it, I had to abandon it because back on those days I needed to start working on Whack Mania.

Together with me working in this new version was Juanmi, making all the graphics. He actually finished all his work but I never got the time to put it all together. After the release of Whack Mania the engine had changed so much that making it work again was a bit complicated.

That was until this past summer when I actually realeased Whack Mania for 3ds. I was thinking which other project I could work on after it when  william341 in the gbatemp forums suggested me to work on Rokoban. There are other projects I was thinking of but then I did a quick test and in a couple of days (holidays, yeah!) it was running again. Althought making it work is just the first step I decided to focus on it, the good thing was I already had all the graphics and menus :)

A few months have passed and finally I am going to release it hoping you will enjoy it and it will become a good contribution for the 3ds scene which as of today keeps growing and growing. Also I am going to finish what I started 4 years ago with poor Juanmi and he is gonna see his job finally released


Download it from the links below. The game is available in 3ds, cia and 3dsx format. There is also the Windows version if you wanna give a try on your PC. I also have an Android and IOS build but I don't really know what to do with them...

Download: Rokoban 3DS

Download: Rokoban Windows

As usual, please leave me your feedback in the comments. Thanks in advance!


Thursday, August 13, 2015

Familiar Game Camp

The Familiar Game Camp was celebrated the past  August 1st-2nd at Málaga, in the south of Spain (sadly we didn't find the time for visiting the beach :_(... )


It was a weekend for meeting nice people and sharing our experiences, and also meeting the new generations. There were workshops for chiptunes, pixel art and Gameboy development and talks about the Familiar Game Jam, Publishing on Steam, Game Art, AltGames and Not Games and what to do with your free time.

This time I didn't want to talk about some technical stuff so my talk was a bit more related to what I do with my free time, based on my experience along all these years of videogames development.
Here are the slides of the presentation I offered
- Programar por Trabajo vs Ocio (spanish)
- Coding for Work vs Fun (english)


You can find some posts covering the event here:
- Official website (with links to all workshops and talks)
- Sergeeo's post (he is the one organizing so you should take a look)
- Crónicas de #FamiliarGameCamp
- Twitter #familiargamecamp (I have stolen all the photos from there, yeah)

Some of us were missing the Game Conga, but maybe next year it will happen...  :D

I hope to see you again soon!

Whack Mania on Nintendo 3DS

Remember Whack Mania? You should if you know me, but just in case here is a video to refresh your memory

I have finished porting my little engine to the nintendo 3ds meaning the game is now working too. As you can see


I needed to to a few changes before releasing it:
- Since the game was thought to use a touch screen I had to adapt the controls a little bit (I could have used the touchscreen but I wanted to have the 3d effect instead
- I have reviewed all the levels and kept only those that I considered fun enought (from 40 levels, there are only 14 here... you can take a look at my postmortem to see why :P)
- I had made myself sure that the game doesn't have any memory issues and it is stable (and it is now). Also I needed to check it was working using the Homebrew Launcher, cia or 3ds formats
- Some other minor changes I don't remember right now. But the good thing is that the code is exactly the same that I used for the IOS or Android version


Here is the link if you wanna give it a try. The game looks awesome on the 3ds :)

Download: Whack Mania 3DS


Sunday, July 19, 2015

3DS Homebrew Tips and Tricks (III)

This is the 3rd post on the series 3DS Homebrew Tips and Tricks
3DS Homebrew Tips and Tricks (I)
3DS Homebrew Tips and Tricks (II)
3DS Homebrew Tips and Tricks (III)

6. Adding sound permissions to 3ds files

Searching on the forums about sound you will find posts saying you cannot have sound using 3ds or 3dsx format (for example take a look af the F.A.Q in the blargsnes site or their wiki). So I spent a few days implementing my sound driver using the cia format that was supposed to be the only one supporting sound

That was hell. Everytime I needed to change anything I had to create the cia, transfer that to the console somehow (microsd management turned out to be the best option), delete the previous cia and install the new one. There wasn't anyway that I was aware of to automatize the whole big process.

Then I found this post clearly stating that the only thing you needed for having sound support in 3ds files is adding ns:s, am:u and csnd:SND service access on your rsf. Take a look here.

With the new ninjhax 2.0 released it seems that sound is also supported now on 3dsx files

7. Avoid GPU_TRIANGLE_FAN

It took me a few weeks to catch a random crash (the best of them) on one of the tests I was doing. At the end it turned out it was caused by using GPU_TRIANGLE_FAN somewhere on my code. After replacing that with just GPU_TRIANGLES it never happened again. 

Talking about this on #3dsdev on the irc channel there seemed to be at least one other person having the same issue. Probably there is still something wrong on the ctrulib with them so I would recommend not using them if you can.

8. Using RomFS

RomFS is the file system used by 3ds and cia files to store resources inside the rom itselt. Although there are some tools available for extracting it from dumped roms and then putting it back, the ctrulib doesn't have support for it yet.

I thought it would be great if I could distribute my apps without any external dependencies so I took a look into it. 

There are two ways to include a romfs into your builds:
 - The first is creating it with an external tool (like RomFS Builder) then using the -romfs option when calling makerom.
 - The second hasn't been fully implemented (according to 3dbrew) but it worked for my particular case. On the rsf file you should add
RomFs:
  # Specifies the root path of the file system to include in the ROM.
  RootPath                : "../bin/romfs"
The rootpath is relative to your makefile's location

With any of these options you will have a rom that includes a file system with the resources. Now, how do you get access to them? Take a look at the code I posted on this thread.

This code only gives you access to the romfs. Now because we don't have support for this filesystem we have two options:
- Implement it
- User another known Filesystem

I went for the second one. Since I worked a lot with .zip files when I ported the engine to Android I decided to use the same thing here. So basically, my filesystem is a zip file containing all my resoures placed inside a romfs.

Since this zip is the only file available on my romfs I just do a search of the string "PK" from the beginning of the romfs and there is my zip file located. Hacky, but works pretty well


9. Painting steps: clean, render, transfer and swap

As I said before my starting point was the gpu example. If you spend some time trying to understand how it works you'll soon realize this is what happens after the GPUCMD_Finalize() command:

- GPUCMD_FlushAndRun is called and the command list is processed making the rendering
- GX_SetDisplayTransfer is called after that and the content of the framebuffer is trasnferred to the specified LCD framebuffer
- GX_SetMemoryFill is called, cleaning the color and depth buffer
- gfxSwapBuffersGpu is finally called, swapping buffers (because the ctrulib by default uses double buffer)

This process happens for a single render, if you are using the 3D effect it will happen twice, once for each screen (I am just simplifying it)

So basically: we render the current frame, transfer it to the proper LCD, clean the frame and then do the double buffer swap. Anything strange here? We are cleaning the screen for the next frame before the next frame actually happens, and that's a bad idea because:
- At some points on my code I was changing the clear color and that was delayed one frame. 
- At some points on my code I wasn't interested on cleaning the color buffer for a specific frame and it was being cleaned in advance

This is actually easy to fix if you move that call to GX_SetMemoryFill to the beginning (before calling GPUCMD_FlushAndRun). Don't forget to move also the call to gspWaitForPSC0, and ensure that you actually want to clear the current color buffer or depth buffer.


10. Improving the 3D steresocopic effect

Another problem that I found with the gpu example is that no matter how you place the 3D slider on the console it is very hard to the get the feelling of 3d. Taking  a look at the code I found these calculations being done for each eye:

mtx44 m; 
loadIdentity44((float*)m); 
translateMatrix((float*)m, interaxial*0.5f, 0.0f, 0.0f); 
gsAdjustBufferMatrices(m);

what this is doing is adding a translation to the whole render process for each eye. So basically moving the camera to the left for the left eye and to the right to the right eye. It just doesn't work well. I changed it into this

mtx44 m; 
loadIdentity44((float*)m); 
rotateMatrixY((float*)m, -slider * 0.06f, false);
gsAdjustBufferMatrices(m);

which rotates the camera instead of displacing it for each eye. This works way more better :)


And that's it. I have concluded these series of posts. I just hope anything I had been writing these days will be useful for someone and I would like to see more homebrews released on this amazing console. Specially games.

Happy coding!

Saturday, July 18, 2015

3DS Homebrew Tips and Tricks (II)

This is the 2nd post on the series 3DS Homebrew Tips and Tricks
3DS Homebrew Tips and Tricks (I)
3DS Homebrew Tips and Tricks (II)
3DS Homebrew Tips and Tricks (III)

3. Application Icon, banner and RSF

If you are going to distribute your creations on cia or 3ds format then you are going to need a banner and an icon. For this I am using bannertool  cerated by Steveice10. You can find a compiled version of it on this thread

- Icons: you create icons using this:

bannertool makesmdh -s $(APP_TITLE) -l $(APP_DESCRIPTION) -p $(APP_AUTHOR) -i icon.png -o icon.smdh

where icon.png should be a 48x48 image. You can define AP_TITLE APP_DESCRIPTION and APP_AUTHOR somewhere else in your makefile, like this

APP_TITLE := "Jumping Jack" 
APP_AUTHOR := "Zalo" 
APP_DESCRIPTION  := "My very first game for the 3DS"


Icons should alse be distributed with your 3dsx file so the homebrew launcher can display information about your homebrew


- Banners: you create banners using this

bannertool  makebanner -i banner.png -a audio.wav -o banner.bin  

where banner.png is a  256x128 image (you can use transparency) and audio.wav I am not sure but I am always using 16 bits, 44100 Hz and stereo for them


- RSF: this files are configurations files for your project. You need a different one depending if you are going to build a cia or a 3ds. There are two good examples on Rinnegatamante's Lua Player Plus for 3DS. Here is the rsf for 3ds with audio support (see point 6) and the rsf for cia files. You only need to edit the BasicInfo and TitleInfo usually. For the TitleInfo you are gonna need a UniqueId. It is recommented to use and ID between 0xF8000 -0xFFFFF or 0xFF000 - 0xFF3FF which is used for Evaulations and Prototypes, ensuring you won't have a collision with a released app. To ensure you don't collide with another homebrew take a look at this post

The banner, the icon and the rsf are required for makerom to create your 3ds using the command

makerom -f cci -o $(PROJECT_NAME).3ds -rsf gw_workaround.rsf -target d -exefslogo -elf $(PROJECT_NAME)_stripped.elf -icon icon.bin -banner banner.bin

or to create your cias using the next one

makerom -f cia -o $(PROJECT_NAME).cia -rsf cia.rsf -target t -exefslogo -elf $(PROJECT_NAME)_stripped.elf -icon icon.bin -banner banner.bin 

[Update: take a look at the 3DSHomebrewTemplate created by Steveice10, those are probably the best makefiles around]

4. Pica Texture Format

Textures are optimized on the 3DS GPU in a special format optimized for cache called Pica Texture Format. This means that in order to use it with the GPU_SetTexture  function, first you need to convert it (either on real time or preprocessing it first)
It took me a while to get the code working for this (as you can see on this thread). But yeah, you just need to copy the code I posted there (actually I forgot to do it and I just did it now)

5. Sideways framebuffer

The framebuffer on the 3ds screens is sideways. Meaning it really goes like this:
In other words, what you really have is an screensize of 240x400, so if you don't do anything special this is what you'll get:
Usually you don't want this (not in the 3DS specially, because if you rotate the console you cannot have the 3D effect working). You need to do three things

- Everywhere in your code where you need the screen size, use 400x240 (which is what we want)
- When you set the viewport size make sure you swap the params. In other words, call

      GPU_SetViewport((u32*)osConvertVirtToPhys((u32)gpuDOut),(u32*)osConvertVirtToPhys((u32)gpuOut), y, x, h * 2, w);

- You need to premultiply your projection matrix by this one

      float mtx_projection_tmp0[16] =
      {
       0.0f, 1.0f, 0.0f, 0.0f,
-1.0f, 0.0f, 0.0f, 0.0f,
       0.0f, 0.0f, 0.5f, -0.5f,
       0.0f, 0.0f, 0.0f, 1.0f
      };

which basically swaps the x and y axis and also converts z from [-1, 1] to [-1, 0] because those are the viewport coordinates for the 3DS.

Now you can use the typical functions for creating a projection matrix, ortho, oblique... this is important if you are working on a cross platform environment. Creating a particlar case for a specific platform is a bit annoying and will cause you problems

Friday, July 17, 2015

3DS Homebrew Tips and Tricks (I)

So, as I said on my previous post I am gonna start a series of posts talking about some things that might be useful for those of you intereseted on developing for this machine. For me this is just a hobby and I cannot dedicate 100% of my time, just 1 hour a day and a little bit more during the weekends, so being stuck on something is a bit frustrating.

I have spent much more time stuck on some stuff and searching on forums than actually coding. Hoping that this will help you I have made a compilation of the things that would had saved me a lot of time if I had knew how they were before.

This is the 1st post on the series 3DS Homebrew Tips and Tricks

1. 3dsx, Cia and 3ds

These are the 3 formats that you can compile your programs into.

- 3dsx this is the format that the ctrulib (which is the SDK for homebrew in 3DS) supports officially. If you are gonna release something you should distribute it under this format. You need to execute the Homebrew Launcher to use it. You need to execute ninjhax for that. The problem is, some of us cannot do this, either because we don't have Cubic Ninja or because we have updated our emunands beyond 9.2 and now it doens't work anymore (take a look at this post)

- Cia this is the format that you use for stuff that needs to be installed in the console (as channels). Some people doesn't like it because it has been used a lot for piracy (way more than for homebrew). You need to use a CFW (Custom Firmware) and then a CFW installer in order to use it. You don't need a flaschcard for this but your console needs to be on 4.5 firmware

- 3ds this file is the oficial format supported by nintendo. You need a flashcard for this and that's why some people doesn't like it.

As I said the makefiles that come with the ctrulib only support building for 3dsx. If you want to create your own makefiles supporting those formats you can take a look at the ones used in GameYob. You still need to take a look at how to create banners, icons and sounds but I will cover that on the 3rd point.

2. Setting up a good Developement environment

I am not going to cover here how to get started with 3ds homebrew. You can take a look at my previous post here. In sort you need to download devkitpro and from there devkitARM. I don't recommend installing ctrulib from devkitpro. The version that comes with it doesn't include examples and it is hardly up to date. Your best option is getting ctrulib from github and compiling it yourself. You need to be careful because then you are gonna be working with a library that is not stable but you can always take a look at the changes and see what's going on. I usually update it once a month unless there is an important update.

Take some time compiling and running the examples. If one of them doesn't work take a look at the last time it was updated and try again with a branch created on that day. If you are planing to do 3d games the best start point for you is the gpu example.
Once you reach the point when you have compiled and executed some examples and played with them a bit using programmers notepad (or any other text editor you want) you might start considering using another IDE a bit more powerful

The one that I am using is Visual Studio 2010 but what I am gonna post here should be very similar in any other version.
 - Create a makefile project


 - Linking it to our Makefile
 Go to Project properties and configure it like this:
    - Build command line: 
                            make
    - Clean commands: 
                            make clean
    - Rebuild command line: 
                            make clean 
                            make

you can now close visual studio go where you have created this project and copy it into the folder of the example you want to compile. After that if you open it and compile, it will run the makefile and create a 3dsx as expected. Rebuild and clean will also be working as usual

- Adding intellisense
Add the next paths into the Include Search Path
 - C:\devkitPro\devkitARM\arm-none-eabi\include
 - C:\devkitPro\devkitARM\include
 - C:\devkitPro\libctru_git\libctru\include
where C:\devkitPro is the folder in your harddrive where you have installed devkitpro
Now code completion should be working as well as going to function declaratinos.

 - Creating a external tool for copying contents into the console
   - In yout makefile add a target called install similar to this:
                install:
                  cp ../bin/$(PROJECT_NAME).3ds g:/
                     @echo Done 

   - Go to Tools/External Tools
   - Add a new Tool called Install like this
   - Now Create a New Toolbar called Homebrew (Tools/Customize/New...)
   - Go the Commands tab and select the toolbar created. Press Add Command and in Tools search select External Command 7 (yeah.. this is a bit ughhh... but it works)
You should now see your new ToolBar located in the Toolbars and a the button Install on it
Now when you compile you just need to put the SD on your computer, press Install, wait for the message "Done" and put it back on your console to execute

This is very useful if you have a flashcard and you work with the 3ds format. Actually this is the fastest way to work. Compilation times are big and you need to reduce it the maximum posible (bear in mind that sometimes you just change the value of one var and recompile and you need to see the results as soon as posible). This is how I usually work
- I run the latest build on my 3ds and see that something doesn't work
- I take a look at the code, detect what's happening and make some changes. Then press F7 to compile
- While compiling I stop the build on the 3ds (by pressing the home menu and then closing the app)
- I take out the flashcard form the console, then the micro SD inside it and put it on my laptop
- By that time the compilation has finished so I jsut press Install
- I wait for the "Done" message, take out the micro SD from my laptop, and plug it in on the flashcard
- I put the flashcard on the console, select the rom and run it

This is usually about 20 seconds, which is not bad. And it is actually faster than sending the build via FTP (because you need to launch the client on the console for that, then send it form your computer, then close it... and it fails a lot). 

It is even worst if you work with cias, because you need to install them on the internal SD and you cannot remove the SD while on emunad (the console freezes). You can again send the content via wifi (using the tool from nintendo is the best way, see this post) but it takes too much time.

Again, this is up to you, but for applications that are big I highly recommend getting a flashcard and working with 3ds files directly.

Wednesday, July 15, 2015

Jumping Jack for 3DS

Time for some releases!

As some of you know I have spent the last few months doing  some coding for the 3DS. I have finally finished the porting of my little engine so it is now time for some posts talking about the experience and some things I wish I had knew before I started doing this. I am gonna be doing this during this week and the next one

But first. I want to release my first homebrew on this console: Jumping Jack 3DS. This is basically a port of the same game I released a few years ago for the Wii
I already wrote a post about it here

And here is the link if you wanna give it a try

DOWNLOAD: Jumping Jack 3DS


UPDATE: this is now working for ninjahx 2.0

Sunday, May 10, 2015

Familiar Game Jam 4 - Dancing with wolves!


So, yeah, one more time our favorite jam was celebrated in Seville during the weekend of 20-22 March 2015. This jam is just growing and getting better with every new edition, all thanks to sergeeo. This time it was celebrated on what we call the Enjoy room on my current company Genera Games. So, for some of us that meant staying at the office the whole weekend (just changing from one room to another). Totally worth it :)


There were 48 presential participants plus more teams working from their places, ending up with a total of 32 videogames. If you want to join the next one pay atention to the twitter account because this last time the presential places flew away in a few hours. You can take a look at the games on the gamejolt  website (google chrome not recommended, because Google has recently stopped supporting the Unity player and most of the games use it)

The topic in this edition was movies from the nineties. So we had to chose a movie from that period and make a videogame based on that. And also the game had to cotain two different endings. You can imagine all of us searching on the internet the top charts from that time. We finally ended up chosing Dancing with Wolves, for several reasons. First, after all these years there aren't any videogames of that film. Second, we've been talking about making a dancing videogame during a long time. And third, we were sure nobody else were going to pick the same one :D

This time I was on a team with two of my workmates pedmuitor and brovador. I was in charge of the graphics (same thing happened on the First Familiar Game Jam, so I am kind of a senior jam artist ^_^U). During the first day we weren't sure if I should work on 3D or 2D. I finally went for 3D and started using 3ds max after all these years. I think it was a good decission because I could do lots of animations that in 2D would have been a pain (and less fun)

I didn't code a single line of code this time. Pedmuitor and Brovador did all the job. And if you are asking who did those wonderful menus it turned out brovador is a secret graphic designer. So basically the three of us were able to do this videogame you can play here (remember, no chrome)


It would be very unfair not to mention our music man. I never mentioned it before, but in the Familiar Game Jams there is a team of 3-4 guys doing the music for all the games. This time we were working with Carlos Vallejo who did a great job, you can listen to the music he did for us here

After the jam finished there was one week for meditating an voting. Our game received an overall score of 3.58 (over 5) and was ranked #9. Thanks everyone who voted us (except those who gave us low scores :D).

Take a look at the games (you can sort them by ranking) and enjoy. I'd like to finish this post with a video that was posted on youtube a few days after the jam took place showing you what a good time we had. See you on Familiar Game Jam 5!

PS: some links covering the event:
- Undead Aubergine enterview and their postmortem (spanish)
- JuegaRPG (spanish)
- Jupiter Hadley post also take a look at her video compilation series covering all the games

Monday, April 20, 2015

Freakend 2015


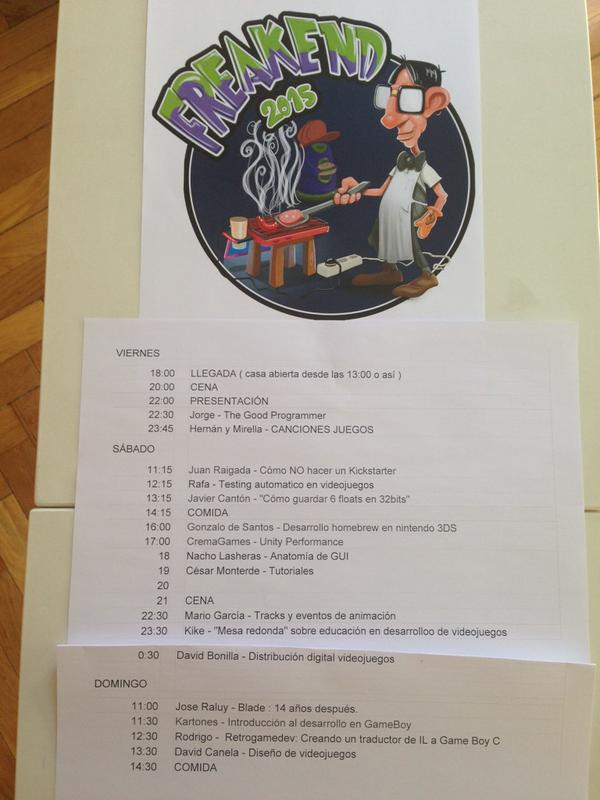
The Freakend 2015 took place during the past 6th,7th,8th of March in San Agustín de Guadalix (Madrid, Spain). What's the freakend you might be wondering. It is basically an event where some people from the industry in Spain gather, talk about videogames, drink and eat pizza. Don't let the name confuse you, in spanish the word freak is used instead of geek, so imagine an event called geekend about videogames and there you go.

This has been the 4th one if I am not mistaken and my 2nd one. Also this has been the first year that the Freakend Android was celebrated, but that's another story. After the good experience of the last year I wanted to repeat again. I don't live in Madrid right now and this kind of events allow me to keep in touch with some old friends (it was good to meet arturogdg and chrisghead after all these years and also Diegobez and flipper83) and follow the status of some companies and the games they are doing.

Besides drinking and eating there are a series of very interesting talks along the whole weekend. On this event there were not only programmers, but also game designers, artists, producers, musicians... with such a mix it is hard that every speak was interesting for everyone, but we had the schedule from the beggining, so in case you were not interested in one of them you could always get along with people outside the main room. I actually attended all of them (I couldn't pay too much attention during saturday morning because I was finishing my own one)


In case you missed them, here are some links to the videos on youtube:
- Hernán y Mirella – GamesYouHear

- Rafael Muñoz – Testing automatico en videojuegos

- Javier Cantón – “Como guardar 6 floats en 32bits”

- Gonzalo de Santos – Desarrollo homebrew en nintendo 3DS: (it's-a me!!)

- Nacho Lasheras – Anatomia de GUI:

- Cesar Monterde – Tutoriales:

- Kike – Postmortem de Heart & Slash:


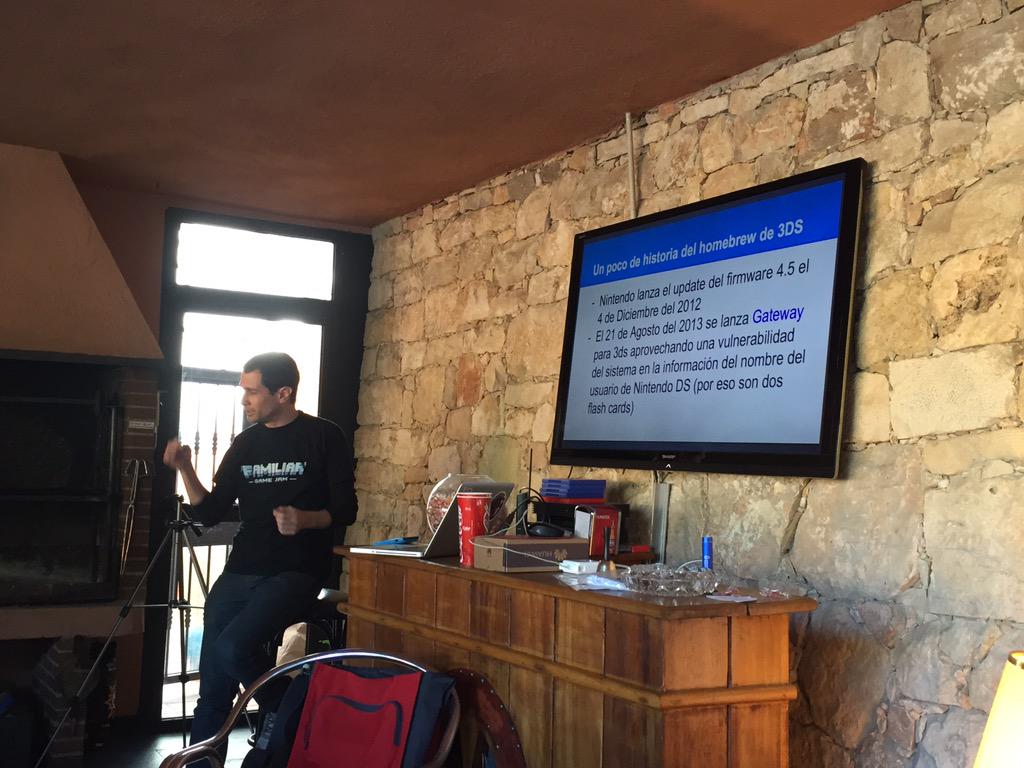
I wanted to talk about the 3ds scene. Because I had already done an introduction here in Seville on February (see my previous post), this time I wanted to talk a bit about the exploit itself. How does some people gain control of a machine that from start has been secured to avoid launching any unsigned program? Also I introduced the current state of the 3DS homebrew scene. Besides the video here are the slides in bot spanish and english

3DS Homebrew (Spanish)
3DS Homebrew (English) 

I'd like to thank again Diegobez who was in charge this year and who did a great job, and flipper83 the creator of the event for insisting me during so many years on attending the event. And for teaching me that just being on a desk doing some stuff is not enought. You need to go out, meet some people, get some feedback, let others know you, etc. The freakend is a perfect opportunity for all this. See you next year!

PS: here are some links to other blogs covering the event (in spanish)
http://visualstudioex3.com/blog/gamedev/eventos/resumen-del-freakend-2015/
http://www.otogami.com/blog/freakend-2015/
http://geeks.ms/blogs/aperez/archive/2015/03/10/evento-freakend-2015.aspx

Sunday, March 15, 2015

Pixels and Coffe 3DS workshop

The past February 10th I was given the chance to offer a workshop introducing the homebrew development on the Nintendo 3DS. At first I was planning to actually talk about the DS but being a console that is becoming obsolete I decided to go for something more actual (I thought it'll be more interesting). This time it was organized by the guys from Pixels and Coffe (if you live in Seville and don't know what I am talking about you should take a look)


Lot of people came and I was happy to share with them one of my hobbies although there were some moments of chaos (ctrulib not compiling, emulators not launching...). I talked a bit about the history of the scene, the emulators, the exploits and we were compiling a Hello-world sample that I run on my 3DS using Ninjhax

Now it would be great if someone will try and join the community but honestly I don't think that is gonna happen :D

Anyways, thanks to everyone who came that day. I hope you had such a good time as I did and you actually learned something. Here are the slides in spanish and english if you want to take a look

3DS Homebrew (spanish)
3DS Homebrew (english)


PS: I am always delayed with it but next post I will be talking about the freakend and the other presentation I offered there
PS2: oh, and the new Familiar Game Jam is just around the corner!

Wednesday, November 19, 2014

Familiar Game Jam 3 (one month later, yippiee!)


The third edition of the Familiar Game Jam took place the last October 17-18-19th. The Familiar Game Jam takes place in Seville (Spain) twice a year and the main purpose of the event is making a game in 48 hours based on the theme selected by the participants and surviving to tell your grandchildren

In this edition the chosen theme was misanthropy and the surprise element was neon lights. 27 games were presented on a jam that edition after edition grows in number of participants and quality of the games
The Rodriguez Team. From left to right: Chetrut, Rafa, Jesús and me.
Missing here are Sergio (music) and Javi Zumer (sound effects) 

It is a good opportunity to meet new people. I was on a team called The Rodriguez (don’t ask) and our product was called GameJamthropy, a Game Jam simulator were you try to code your great game but people talking doesn’t let you so you need to shut them up throwing beers into their heads


We really suffered the last two hours before finishing it, and at some point I was doubting we were going to have a working product, but at the end we manage to do it not without some errors (like that shader not compiling in windows causing all the game look completely pink)


Two weeks after the jam I went with Chetrut to the award’s ceremony and to our surprise the game was given the jury’s award. We would like to thank everyone again for this. Also we found a video on youtube of someone playing it and having some fun which is always very rewarding (and it has a lot of views!)


Being happy with GameJamThropy we decided to continue working on it, fixing the errors and today I have uploaded the final version so far. The code is available on github (it is not a good code to learn anything from, so don’t get too excited ;)) Wanna give it a try and show the world how good your coding skills are? (or how bad :P?) We have implemented higscores for that!


Here are some other articles covering the event
- A playlist with videos of all the games that were presented
- Anait Games talking about it
- Juegonautas
- Offical twitter account
- The offical video that I cannot link properly becuase blogger is shit sometimes

See you on the fourth edition!